 I have been a bronzer lover for nearly the entire time I have been wearing makeup. Not to really bronze me but more to add some warmth and depth to my face. I wear it every single day usually under my blush. It’s one step that I rarely ever skip because I love the effect it gives my face and overall makeup look. Bronzer is for everyone no matter their skin tone. It’s not always to make you look “tanner” but rather to give some glow, radiance and warmth to the complexion. But it can give you that sun kissed glow that mimics what you would get from a beach vacation without actually having to spend time in the sun. Win/win! I myself rarely go in the sun and when I do, I’m covered in sunblock so I do rely on bronzer to give me that warmth and radiance.
I was always a powder bronzer fan and pretty much only used that formulation exclusively for years. One of the reasons for that is it was often the only texture available and cream bronzers were so few and far in between. Over the years more cream bronzers have hit the market and nearly every makeup brand offers one in their line. I have slowly switched over to cream bronzers more and more in the past few years because the formulations keep getting better and better.
How to Apply Cream Bronzer
Cream bronzers often look more skin-like, melt into the skin and really mimic the natural glow that you can get from the sun. A cream texture will always look more natural on the skin than powder anyways. Both still serve a purpose so it is just a matter of your personal preference and skin type. I actually find cream bronzers much easier to apply and often recommend them to anyone not as comfortable with makeup application. In today’s post, I am going to share a step by step guide of how to apply cream bronzer so you get the most flawless and natural application.
 There are many different types of cream bronzers such as stick bronzers, liquid bronzers, solid cream bronzers but the technique for this is much of the same. I personally like to use a brush to apply my bronzers but I will offer some suggestions if you want to use your fingers.
How to Apply Cream Bronzer Stick or Cream Bronzer in a Pan
Step 1 – Find a shade that works for your skin tone.
This may be an obvious one but it is so important that you choose a color that achieves the look you want. Getting something too dark or too light with definitely affect how the product performs and ultimately applies.
Step 2 – Apply the product on cream foundation or liquid foundation.
Honestly there are many people that can successfully apply cream bronzers on powder foundation or powder on the cheeks, but I find it easiest to apply cream bronzer on top of a cream product already on the cheeks. Applying a cream bronzer on top of powder can create issues and patchiness that can make for more work than necessary.
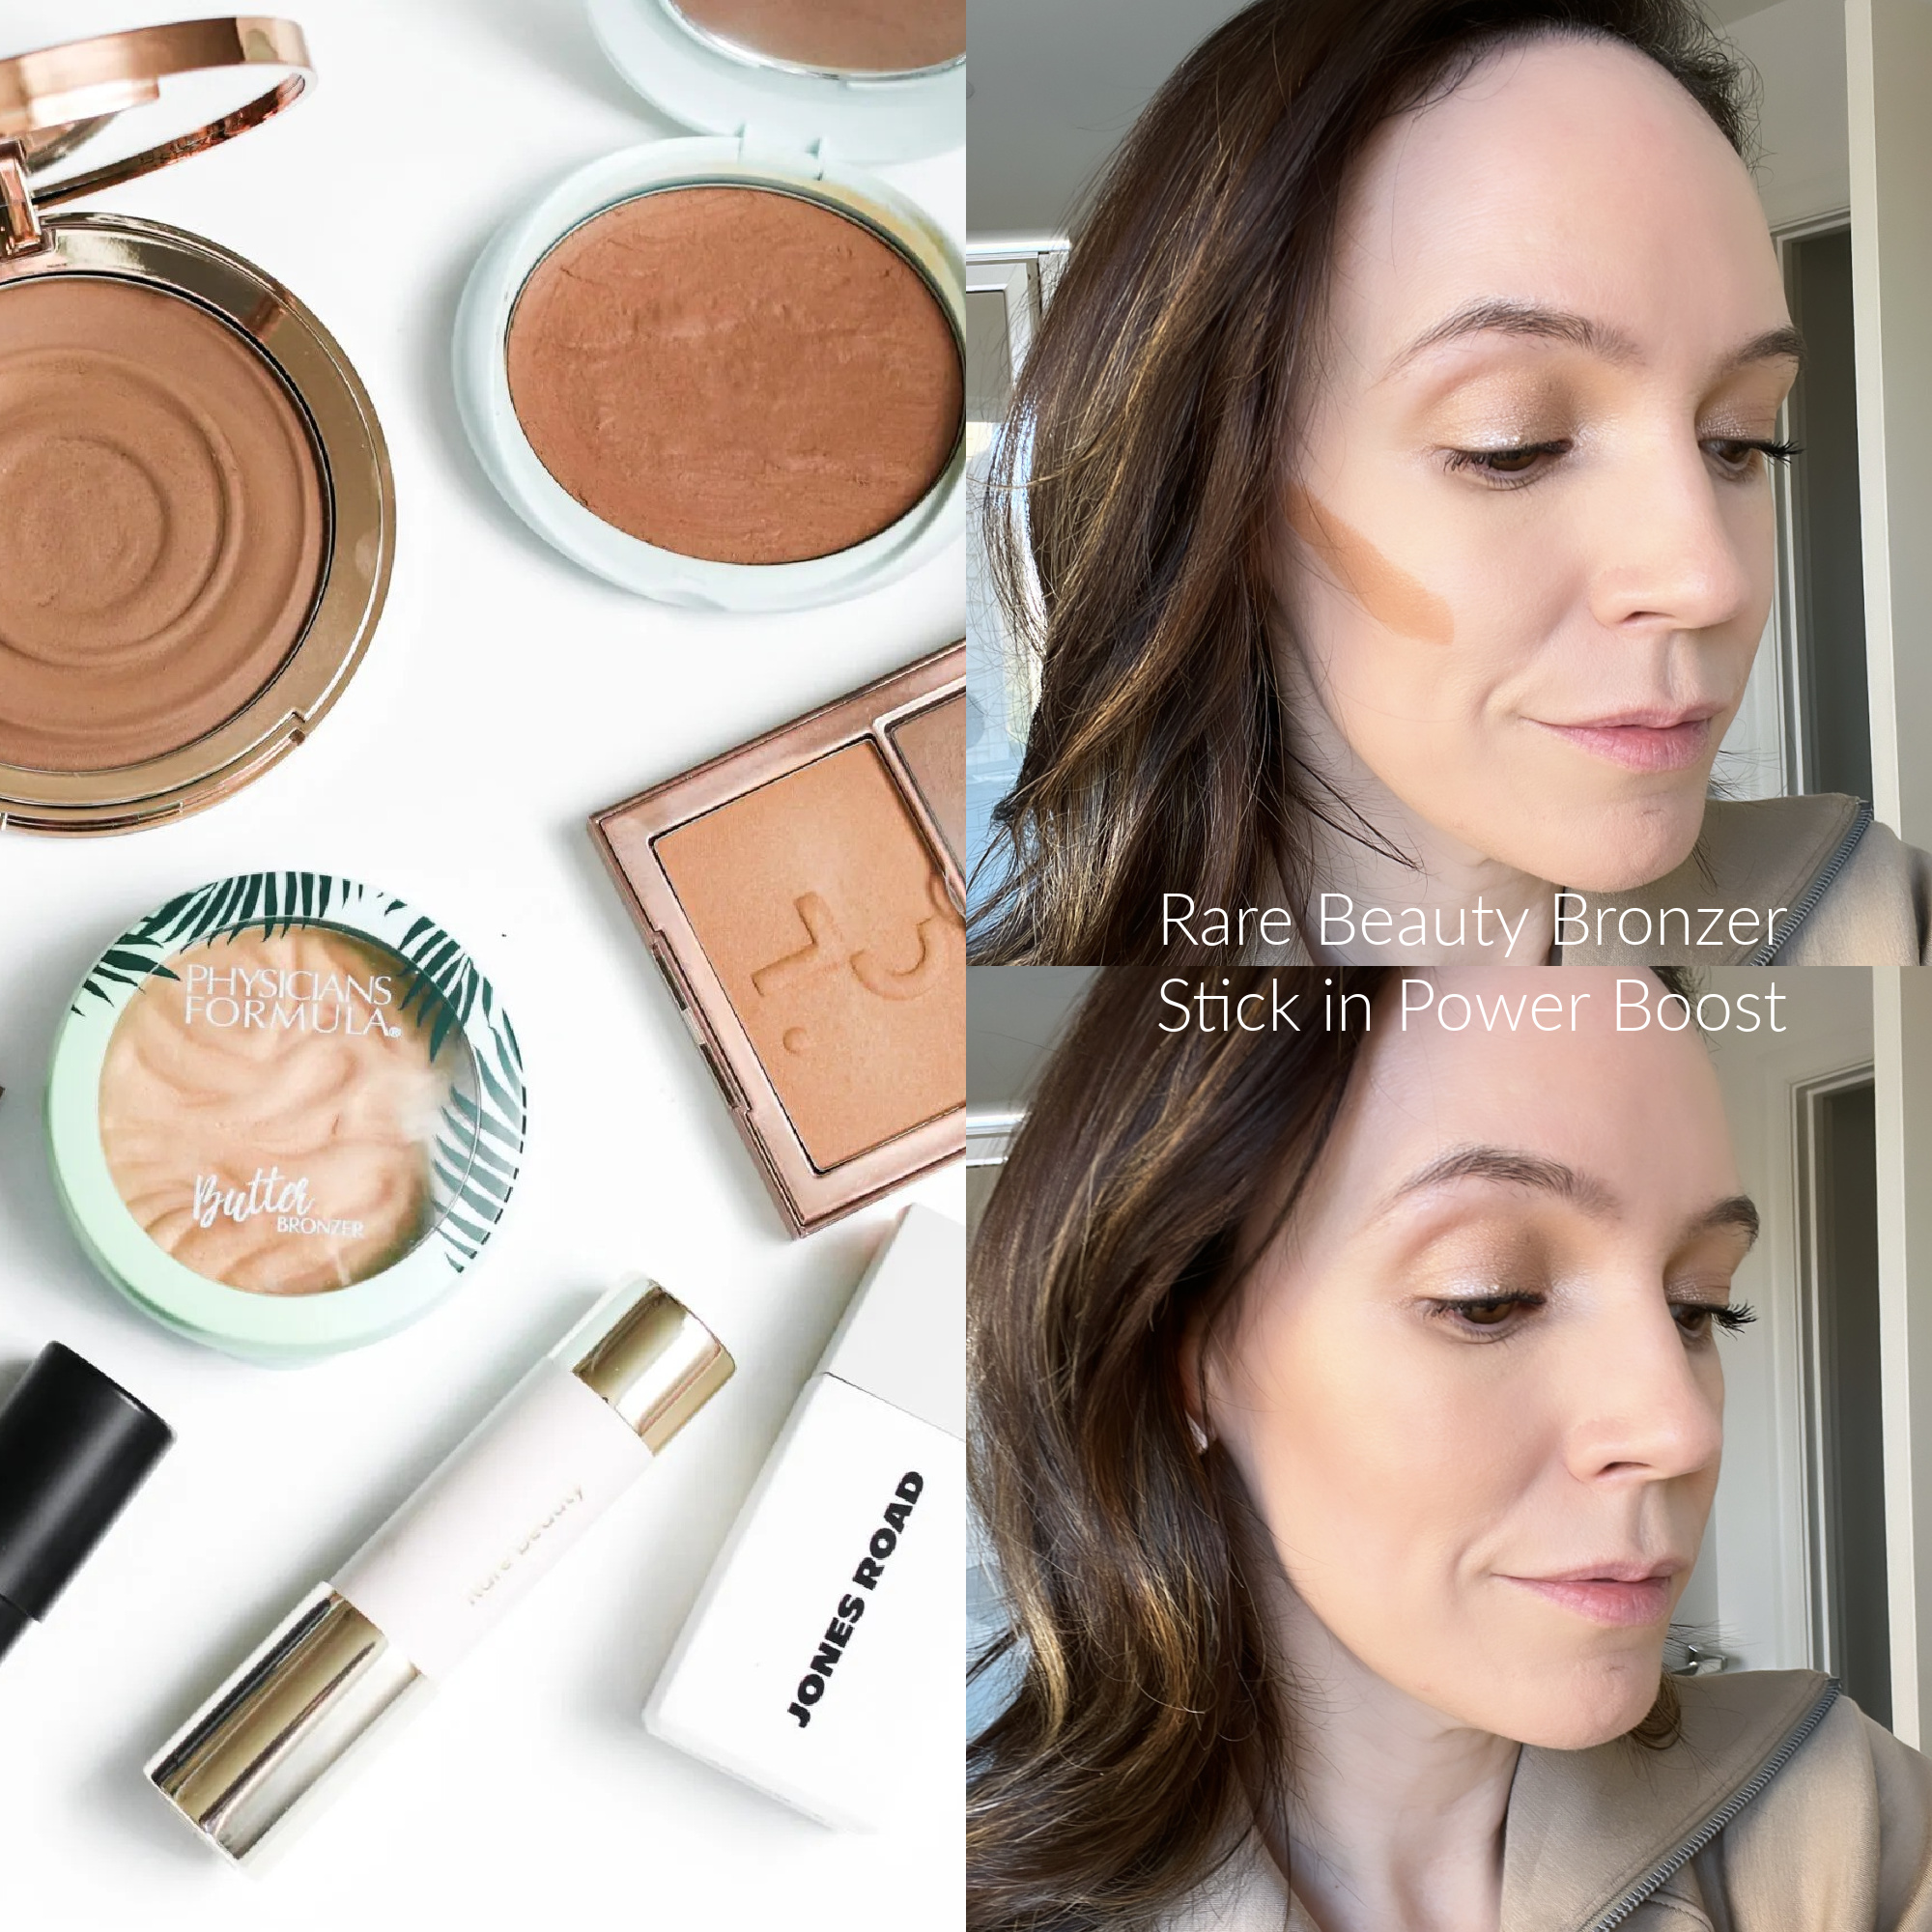
Step 3 – Gently swipe the product on the cheeks going out towards the hairline.
If you are not yet comfortable with the intensity or pigment of the product, just use a few dots rather than a full swipe along the cheek like I did with the Rare Beauty Bronzer Stick in the above photo.
Step 4 – Place the product on the cheekbone/just a bit above and slightly past the apples of the cheeks.
If you place bronzer too low, it will perform more like a contour rather than a bronzer. Try to place it directly on the cheekbone or just a bit above and start a tiny bit past the apple of the cheeks. You don’t want it to be too close to the nose or center of the face. Some people will also place it at the very top of the forehead along the hairline which is where the sun would naturally hit you. I don’t always do this and find it a bit more complex for a simple everyday tutorial so I like to stick with just adding it to my cheeks. But to create a more bronzed and sun-kissed look, this is definitely a great option.
Step 5 – Start small and add more if needed.
Use a very light hand when applying the product directly to the face or just using a few dots. It is easier to add more than it is to remove if you have added too much.
Step 6 – Use a buffing brush
This may take some getting used to but I definitely recommend using a stiff buffing brush to easily blend the product in. Use short strokes to blend the product out.
Step 7 – Blend up and out.
Whether you decide to use your fingers, a sponge or a brush, be sure to blend the product up and out towards the hairline. Do not use downward strokes because it will ultimately blend the product down and not create a natural warmth to the cheeks. Also, be sure you blend the product starting from the center of the face and out towards the hairline. Do not blend the product from the hairline to the center of the face because it will bring the product too close to the nose.
Step 8 – Buff out the edges
This can sound a bit confusing but it is actually probably the easiest part of the process. I like to use the sponge or brush I used to apply my foundation and with whatever small bit is left on there, I will tap it along the edge of where the bronzer ends both on the top and bottom of the cheek. This is to avoid a harsh line of where the bronzer stops and instead gives a smooth blended look. Your bronzer may look blended from the front but from the side, it can still show a definitive line of product so it’s a final step that I feel makes my bronzer look much more natural and seamless.
How to Apply Cream Bronzer with Your Fingers

Step 1 – Find a shade that works for your skin tone.
This may be an obvious one but it is so important that you choose a color that achieves the look you want. Getting something too dark or too light with definitely affect how the product performs and ultimately applies.
Step 2 – Apply the product on cream foundation or liquid foundation.
Honestly there are many people that can successfully apply cream bronzers on powder foundation or powder on the cheeks, but I find it easiest to apply cream bronzer on top of a cream product already on the cheeks. Applying a cream bronzer on top of powder can create issues and patchiness that can make for more work than necessary.
Step 3 – Apply product on the back of your hand
I would recommend applying the bronzer to the back of your hand, warming up the product a bit and then dab your fingers in that to apply. The product will be nice, creamy and emollient which will make it easier to apply and melt into the skin.
Step 4 – Place the product on the cheekbone/just a bit above and slightly past the apples of the cheeks.
If you place bronzer too low, it will perform more like a contour rather than a bronzer. Try to place it directly on the cheekbone or just a bit above and start a tiny bit past the apple of the cheeks. You don’t want it to be too close to the nose or center of the face. Some people will also place it at the very top of the forehead along the hairline which is where the sun would naturally hit you. I don’t always do this and find it a bit more complex for a simple everyday tutorial so I like to stick with just adding it to my cheeks. But to create a more bronzed and sun-kissed look, this is definitely a great option.
Step 5 – Tap the product on
When using your fingers, use a tapping motion to apply the products on to the cheeks rather than swiping or rubbing.
Step 6 – Start small and add more if needed.
Use a very light hand when applying the product directly to the face or just using a few dots. It is easier to add more than it is to remove if you have added too much.
Step 7 – Blend up and out.
Like with using a brush or sponge, be sure to blend the product up and out towards the hairline. Do not use downward strokes because it will ultimately blend the product down and not create a natural warmth to the cheeks. Also, be sure you blend the product starting from the center of the face and out towards the hairline. Do not blend the product from the hairline to the center of the face because it will bring the product too close to the nose.
Step 8 – Buff out the edges
This can sound a bit confusing but it is actually probably the easiest part of the process. Use the tiniest bit of foundation or concealer and tap it along the edge of where the bronzer ends both on the top and bottom of the cheek. This is to avoid a harsh line of where the bronzer stops and instead gives a smooth blended look. Your bronzer may look blended from the front but from the side, it can still show a definitive line of product so it’s a final step that I feel makes my bronzer look much more natural and seamless.
Cream Bronzer Recommendations
 Here is a list of some of my favorite cream bronzers to use and why I love them!
Chanel Les Beiges Healthy Glow Bronzing Cream
The Chanel Les Beiges Healthy Glow Bronzing Cream is a gel-cream bronzer that gives a sun-kissed glow to the skin with a soft matte finish. It’s designed to apply effortlessly and give a smoothing effect to the skin. Though it has a matte finish, there are light reflecting pigments that still give the skin a subtle radiance without being too dewy or glowy. What makes it stand out to me above other cream bronzers is the balance of a soft matte finish that still makes my skin look luminous and sun-kissed.
Makeup by Mario Soft Sculpt Bronzing Serum
This is a definitely a product that is super user friendly and almost foolproof to apply. There is a pump so you can choose to mix product in with your foundation/skin tint or you can choose to use the doe foot applicator to place the product where you want it on the face. You can use it as a bronzer or as a sculpting/contour product to define certain parts of the face. Before I purchased it, I saw a ton of videos on social media of people using the product and it looks so great that I had to try it for myself.
Makeup by Mario Skin Enhancer
The name “Skin Enhancer” can be a bit confusing at first and even had me pausing a second to figure out exactly what the product was supposed to do. In short, it is a form of a cream bronzer but is very sheer and can be used on specific parts of the face or all over to give a subtle radiant glow. There is no shimmer to the product but it does give the skin a healthy glow. It’s a complexion balm that adds warmth to the complexion and can be used to even out the skin tone.
Saie Sun Melt Bronzer
I have really enjoyed this and find it blends easily. The formula is a drier formula which I prefer so while it is emollient, it dries down nicely and doesn’t get greasy. It is much more warm in tone but I still use it regularly and love it.


Comments